Inhaltsverzeichnis
Projects
Create a new project
We consider the example of handling complaints to create a new project. Complaints are known to be the best way to improvement, but only if they are taken seriously and not forgotten. So we open a project, so that the individual complaints can be filed accordingly and immediately stored for the right person.
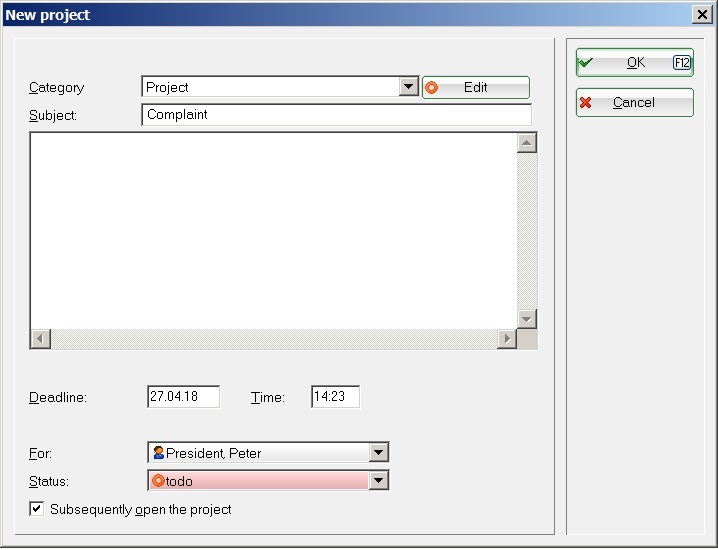
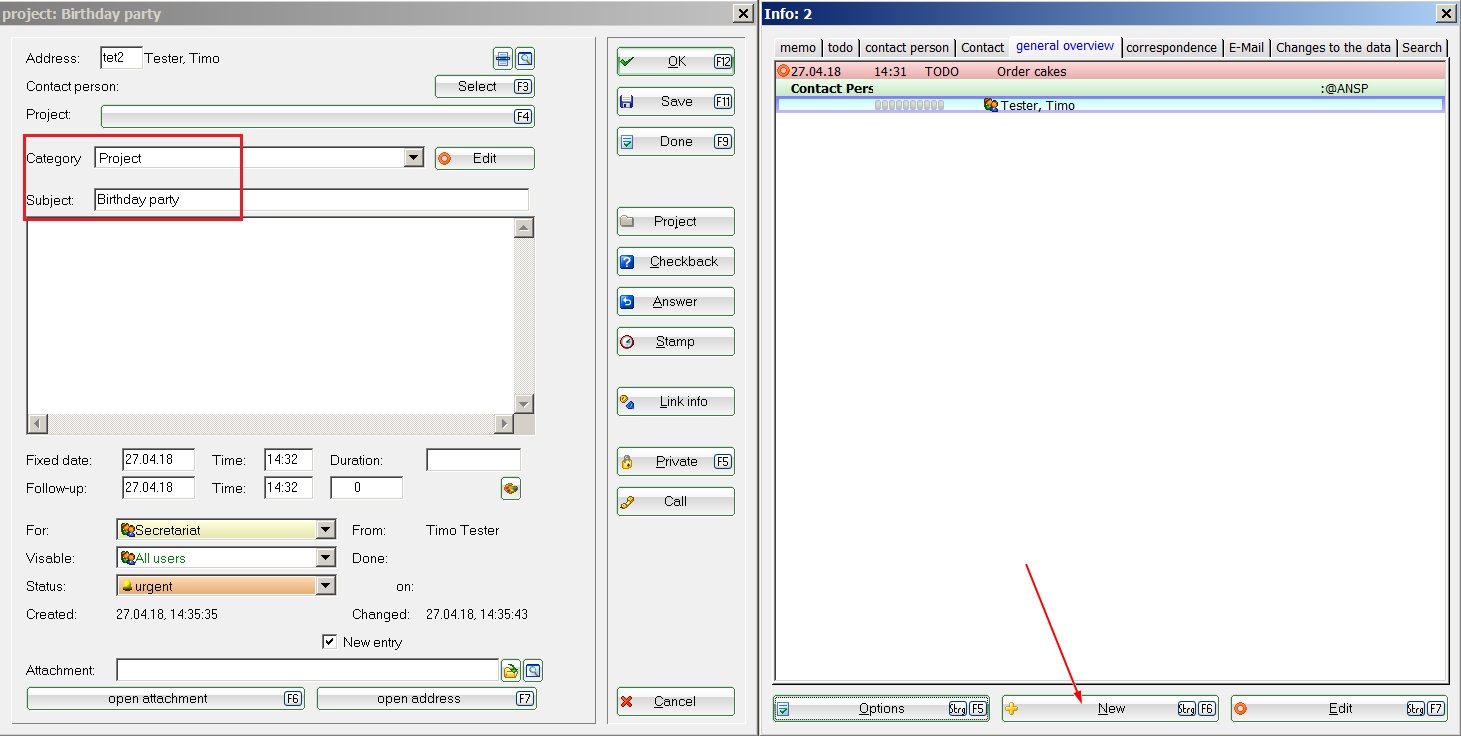
To do this, click in the CRM window of the personal mask (e.g., of the golf club) or directly on the button New from the bottom of the event window below New , select the category Project and conform with OK:
Describe it as a Project with complaints using the subject field, and address it, for example, to the club manager. The status can be set to open, since what is important are the attachments, and not the project itself. Leave the box Subsequently open the project without the check-mark if you want to edit the project even further; otherwise you can remove it and confirm with OK.
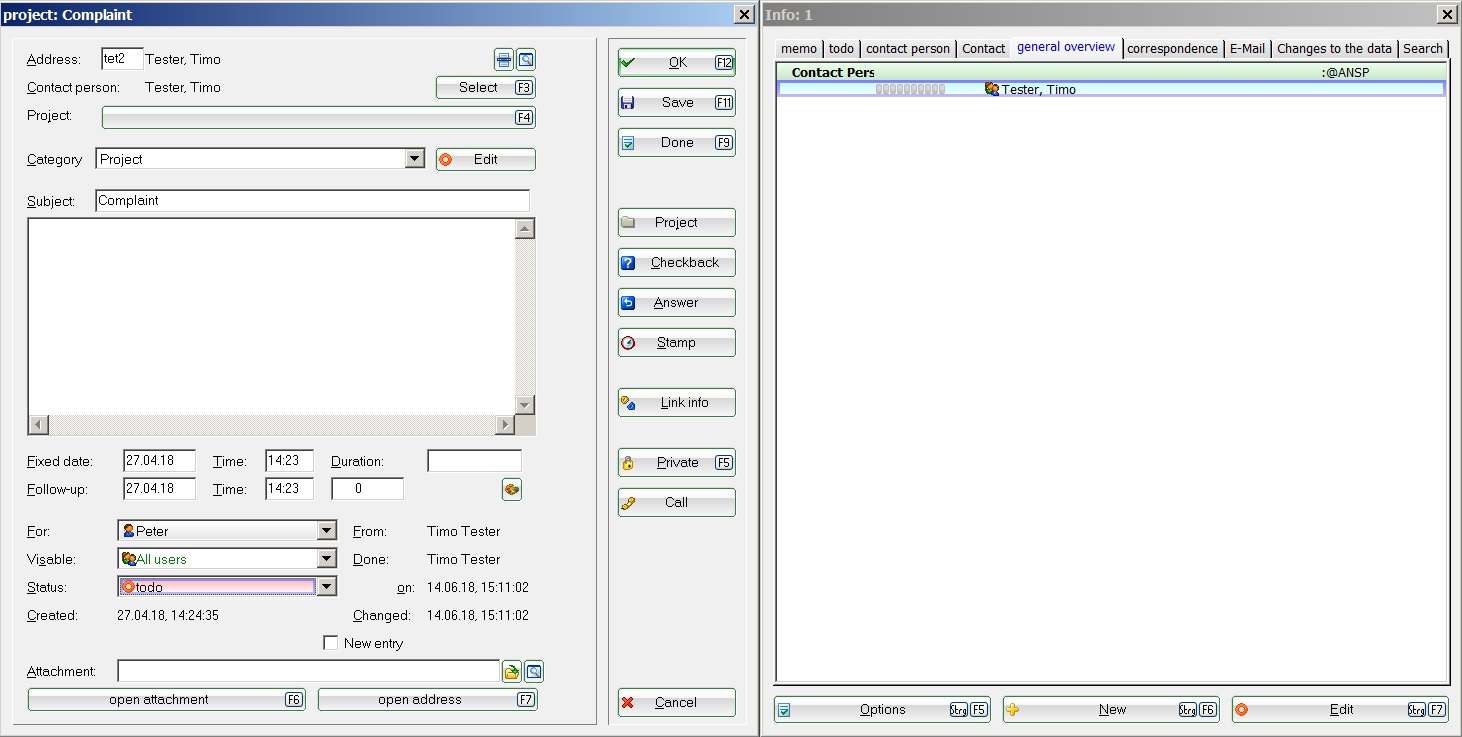
The project now looks like this, and it is stored in the list of open projects and can be accessed:
In order to ensure that all the complaints tickets are assigned to this project, make sure that the Category Complaints has the appropriate check-mark for Ticket must be assigned to a project.
Create a project from the ticket
Individual entries can be assigned to Existing projects for a better overview. If there is not yet a corresponding project, you can easily create this from the ticket.
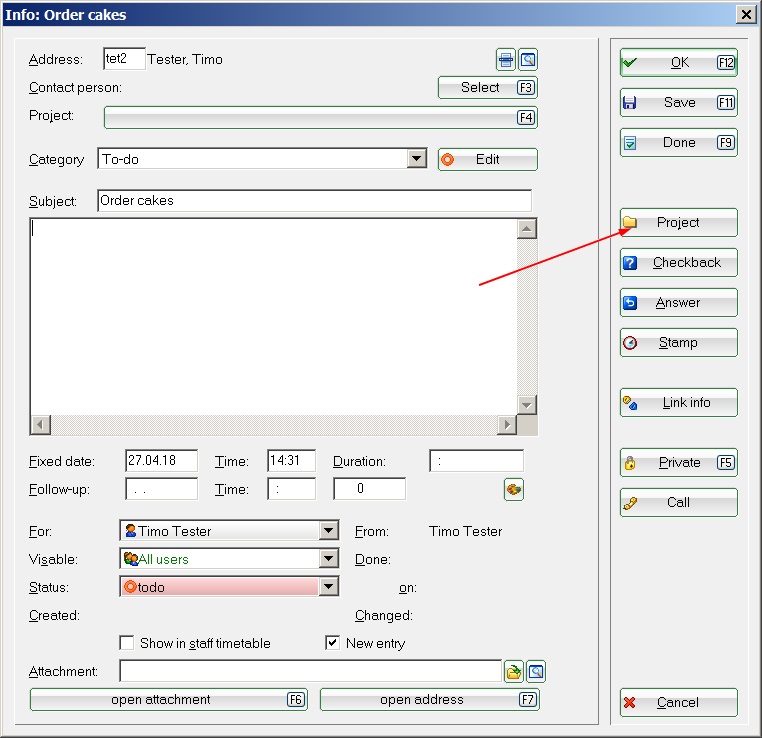
Click on the project button on the right side. The following window opens:
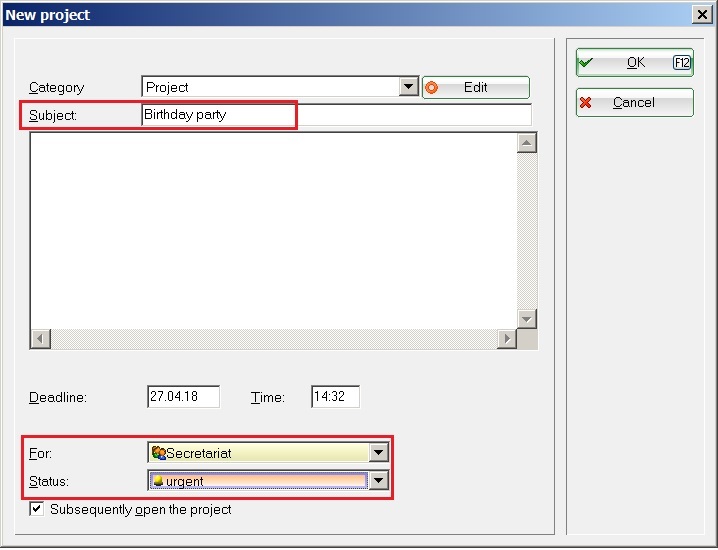
The subject of the project is taken from the subject line of the ticket. If necessary, change the subject as the title of the project, and add more details to the text field if necessary; define for whom this project was created and who can see it.
Confirm with OK.
Add new entries
You can now add more new entries to a project. Click New (F6).
Select the category of the ticket and confirm with OK. The ticket is automatically assigned to the project and can be edited:
Even existing entries can still be assigned to a project. Click on the long Project button at the top of the existing ticket and select accordingly.
Remove existing entry from a project
To remove an entry from an existing project, click on the long Project button and select the lowest option „No project assignment“.
Optical difference of the entries
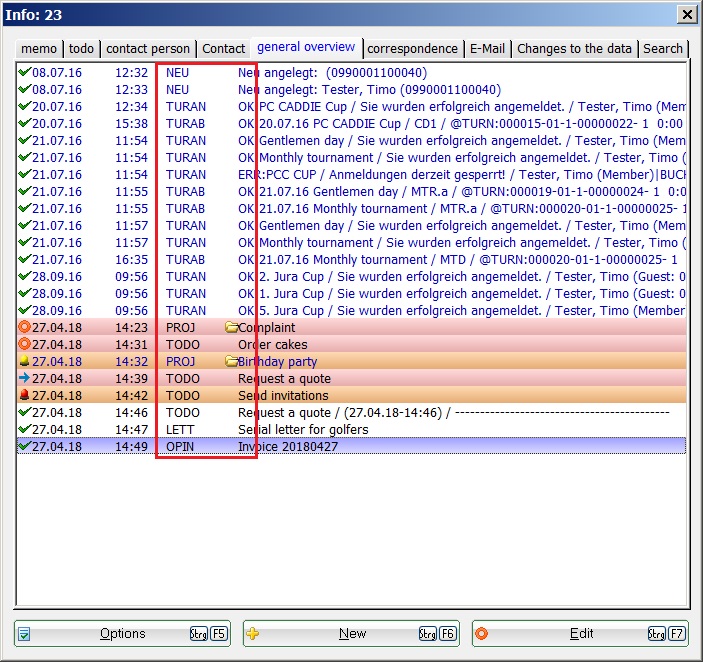
In the overview, the stored entries and projects are stored with different characters. This helps with the search and review:
- Projects are filed with folders
- Single entries and entries assigned to projects are listed without marking. P.S. If the sub-entries of a project are set to done, only the project will remain in the overview.
- Notes of invoices are marked with a small letters, those of serial letters with a pinned note, etc.
Create a project from a tournament
A good tournament preparation and organization is half the way to the goal! Once a tournament with all the data has been created in PC CADDIE, you can also save all the organizational tasks, documents and correspondence associated with it, bundled in a project. This means that you always have all the information at a glance - always visible, easily accessible, chronologically planed and clearly arranged.
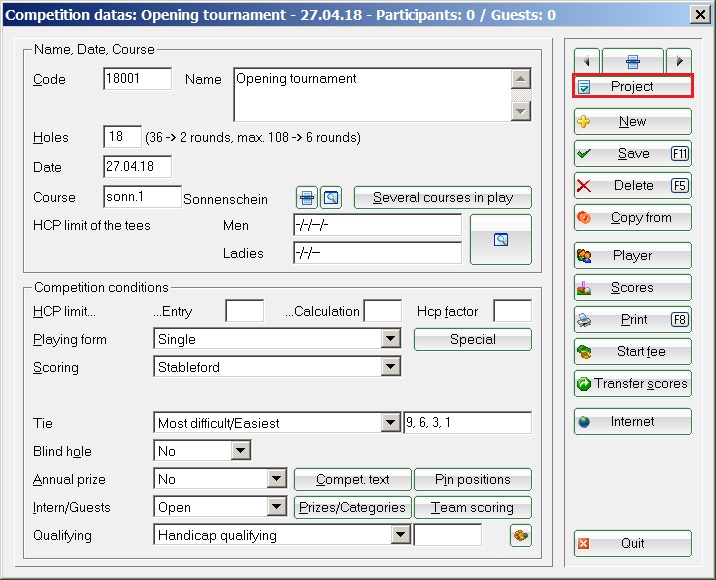
Click on the button Project in the tournament data to make a project from a tournament.
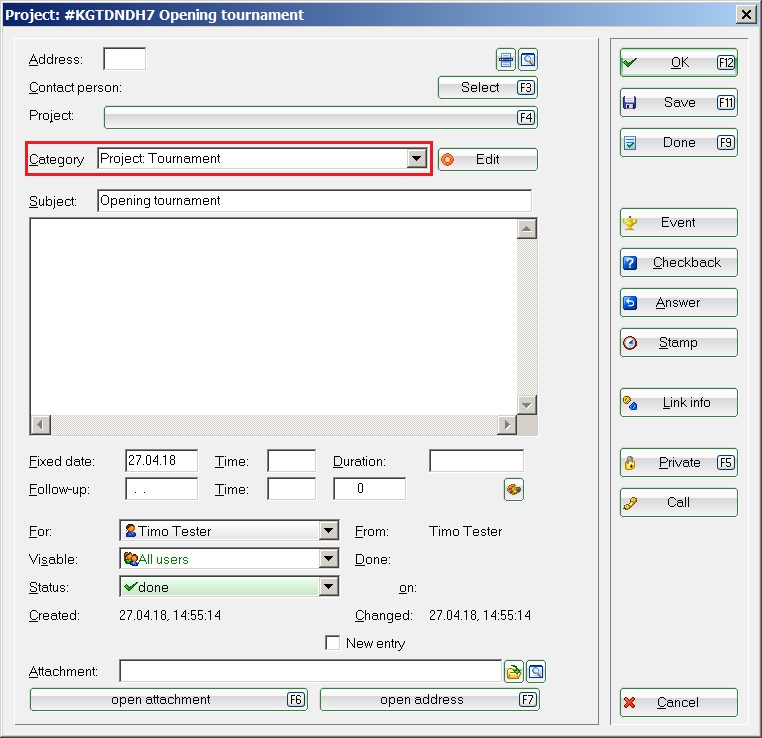
This opens a project window with the category Project: Tournament. This is automatically linked to the game through the project number. If in the address field you entered, for example, a sponsor, you can open this project from the tournament, as well as from your event window and even from the personal mask of the sponsor.
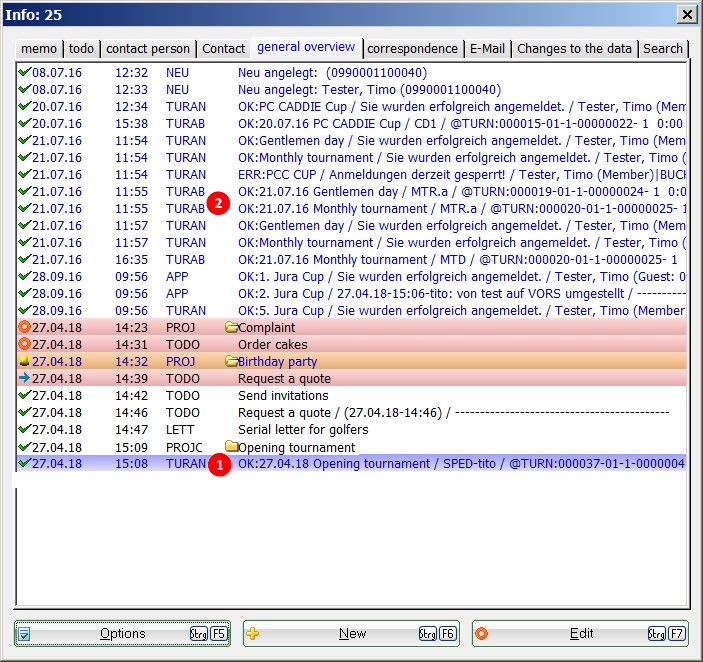
In the tournament information window, under the tab „General overview“, you now have all the automatically generated tickets for the already entered subscriptions and cancellations, with date and time, at a glance.
- TURNAN = Tournament registration
- TURNAB = Tournament de-registration
The category „PROJC“ is the newly created competition project. Here you can now save, plan and view all other organizational information or tasks.
Open tournament from the project
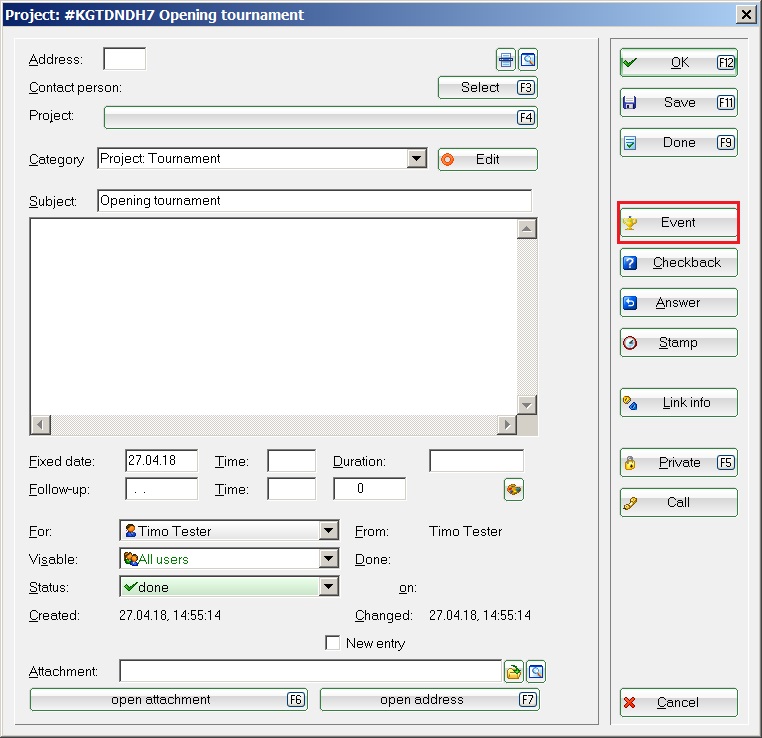
The tournament project always stays connected to the tournament. This means that even if you edit it, for example from the sponsor data, and want to switch briefly to the tournament, you can go directly to the tournament data with the tournament info window via the Event button.
Create a project from a course or event
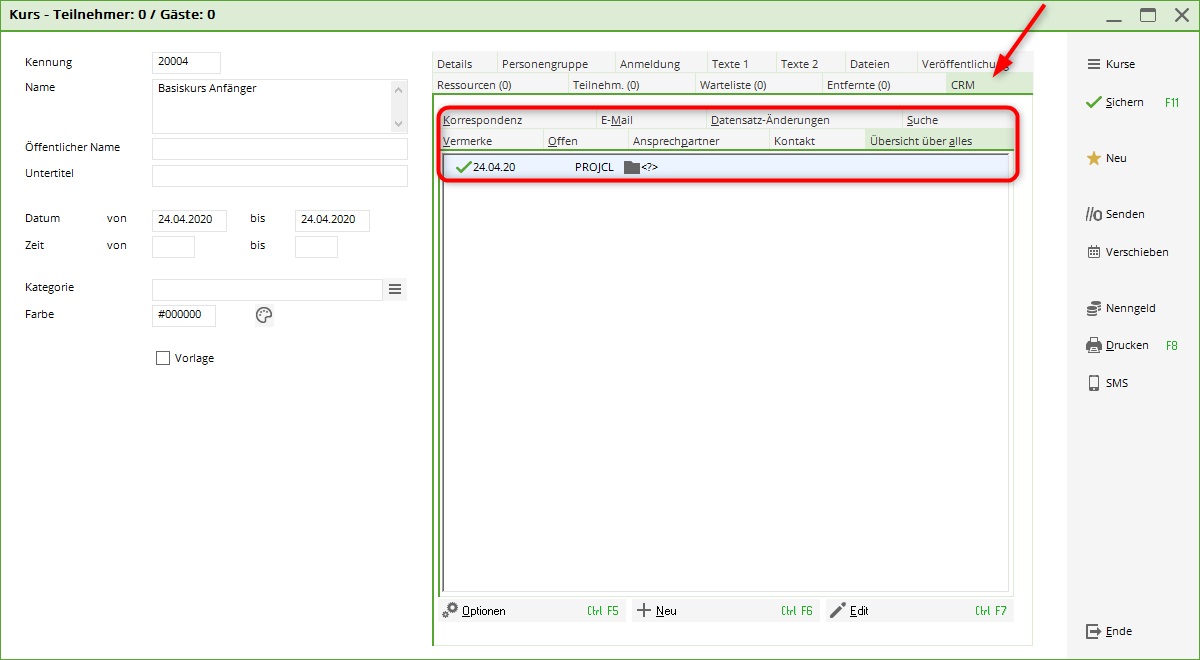
If you are already working with our new course and event module, you have the opportunity here to link the course or the event to a project. The procedure is similar to Tournament. Click on the tab CRM.
You will find the same tabs as in the event window, which help you to keep track of the various entries. Click on the project. You can open it using the Edit button or with a double-click.
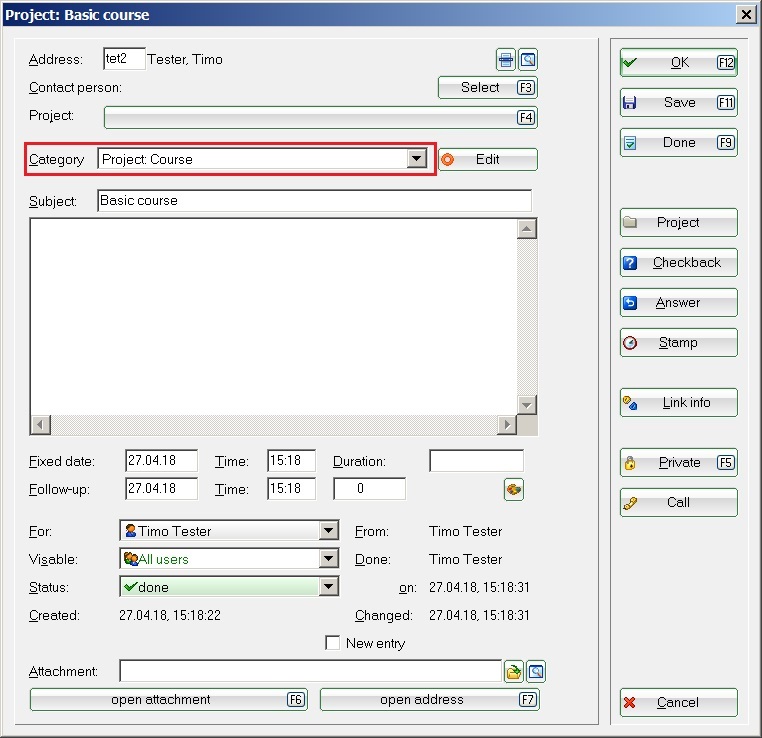
In contrast to the project linked to a tournament, these projects are automatically created in category Project: course. You can now edit the project.
Create a project from a blocking/filter
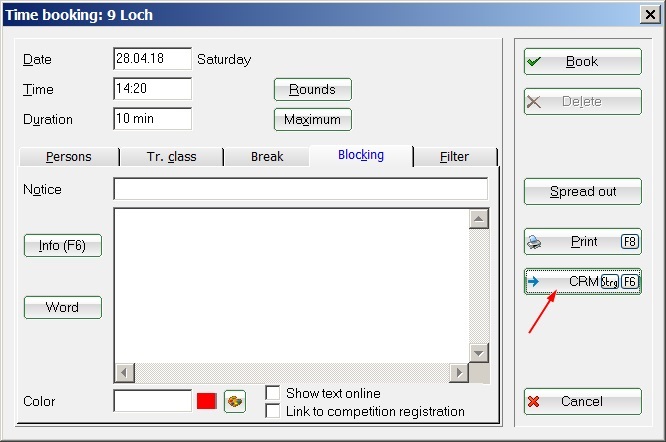
If the tee time bookings are entered in the timetable for groups as a block or filter, they can also be linked to a project the same way as the tournaments.
Projects from Block and Filter are automatically created in the category Project: Timetable. You can now edit the project.
Back to the Overview.

