Inhaltsverzeichnis
Delivery note management
This function is used with the merchandise management module.
Purchases made should be entered in PC CADDIE in as much detail as possible. Delivery note management is used to accurately record each delivery note. Incoming goods can therefore be processed correctly and can be tracked here at any time. Even if you no longer have the original delivery notes from your suppliers at a later date, you can always find the essentials here.
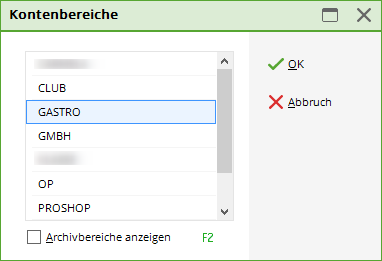
To process your delivery notes, you must first select the relevant account area, e.g. GASTRO or SALES first.
To do this, click on the yellow button in the icon bar
or select in the menu Select sales/account area menu, select the appropriate area.
Entering suppliers
In preparation for delivery note management, your suppliers are created as persons in PC CADDIE. Please read about this under: eingabe_der_lieferanten
Entering delivery notes
To enter the delivery notes, use the menu item Article/Delivery note management
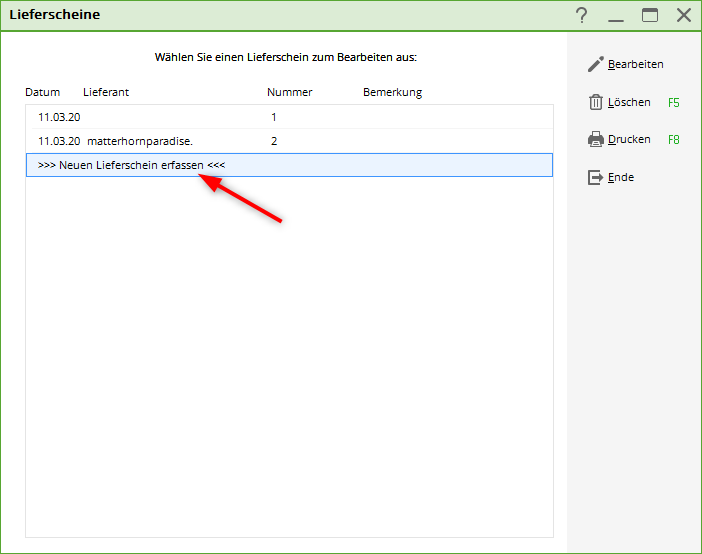
In the „Delivery notes“ window, select a delivery note that has already been entered and edit it using Edit. Or you can enter a new delivery note via Create new delivery note and Edit
The new delivery note is displayed:
- Specify the date of the delivery note.
- The number is automatically assigned consecutively and sorted accordingly (even if the date is not chronological).
- Select the relevant supplier using the list button on the right.
- You can read the information entered here in the list of delivery notes, e.g. the invoice number would be useful here.
- The status „recorded“ can be changed to „checked“, „paid“ or „error“; the corresponding symbol is then directly visible in the overview.
- If the delivery is a new item, click on the list function button on the right and then on Newto create a new item.
- If the delivery relates to an existing item, click on New articleto select the correct one.
- If you are editing an existing delivery note, select Editto make any changes or Deleteto delete the item receipt completely.
- The respective item access is immediately saved for label printing with the help of this tick. Please remove the tick if you do not want any labels.
- The information on the purchase price, sales price, identifier, order number and barcode is automatically updated when the respective check mark is set.
- You can also attach a document to the delivery note.
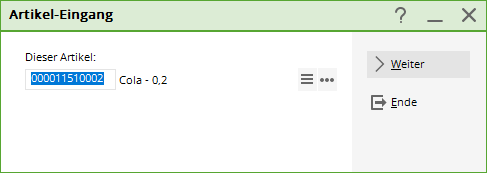
After selecting the desired item (7), press Next
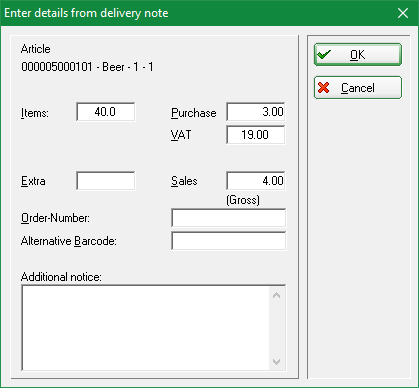
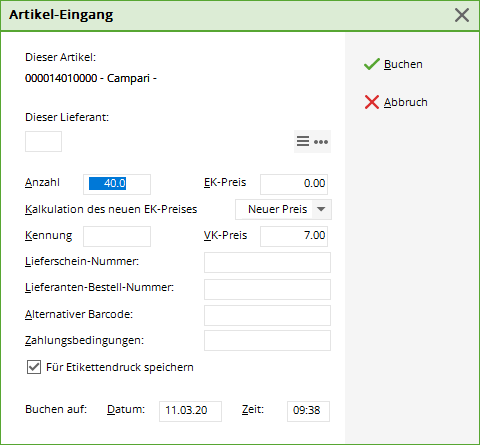
Now enter the number of goods purchased - in our example 40 units. The purchase price is copied from the article entries. If this changes, the new price should be entered here. The desired calculation of the price (new price, average or calculated) is defined in the article (Incoming button):
The delivery note is now entered, the goods receipt is booked in:
Print delivery notes
You also have the option of printing delivery notes.
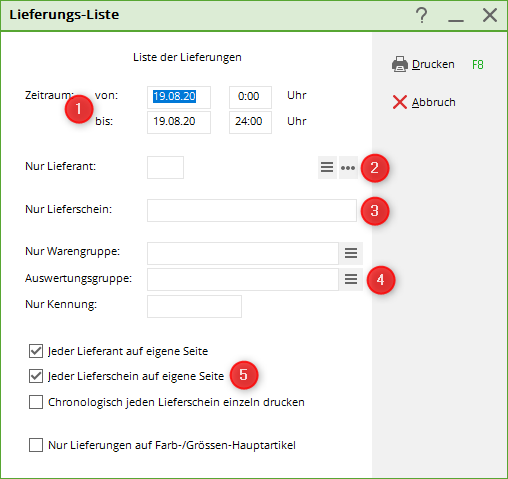
The following window opens:
- Determine the period of the deliveries.
- If required, select the relevant supplier using the list button on the right.
- If you only want to print a specific delivery note, enter the delivery note number here.
- You have further restriction options here.
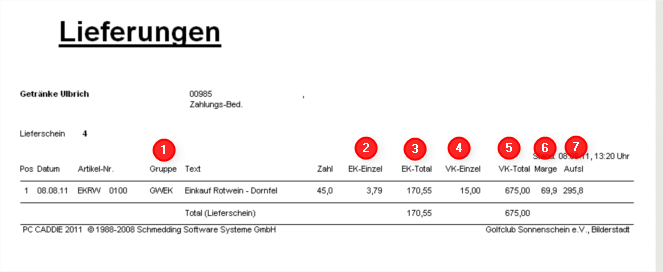
- Both checkboxes are automatically set here, one supplier and one delivery note are printed per page - as shown below.
- the product group of the article
- the purchase price per item
- the total purchase price for the number of items supplied
- the sales price per item
- the total sales price for the number of items delivered
- the percentage margin
- the percentage mark-up
- Keine Schlagworte vergeben

