
Inhaltsverzeichnis
Lockers and caddie boxes
PC CADDIE includes a complete caddie box management system. This is a very helpful function that simplifies the management of caddie box lists and the invoicing of the corresponding rentals. To be able to work with the caddie box management, the required fields must first be installed.
Before you make any changes here, please create a data backup first.
With the function Settings/Programme settings/Additional personal fields you can configure the fields according to your requirements:

Installation of the field configuration
 Before you define the fields, you should think about the layout.
Let's take the caddie boxes as an example:
If your club has a mixture of different locker/place types in consecutive order (1-10 = box with electricity, 11-15 = family box, 16-20 = again with electricity, 21-30 single box etc.), we advise you to use just one general field for all the different types „Box“ and simply define the category using a supplementary letter - we will come to this later. It would also be a good idea to separate the fields by hall, as this allows you, for example, to automatically assign access for a particular hall to people who have a locker in the hall when using online door control. Enter the desired designation in the field above. In our example „Caddie box“. You can determine the type by pressing the button. Select the type „Cupboard/box“ for the caddie space. Now specify the maximum number of characters (length) for this field.
If it is possible for a member to occupy two lockers/boxes, the number of characters should not be too small (otherwise the second locker/box will no longer be recognised as such). If a box number has a
length of 5 characters (003.S), 30 characters, including separators between the box numbers („;“), are sufficient even for 5 boxes per person.
Repeat the steps mentioned above for all the administrations you require (e.g. Locker, Shares, etc.).
Working with the Lockers and Caddie Boxes function
To determine the division and assign the boxes to the persons, select the following in the menu People/Cabinets and caddie boxes or right-click on the first image of the coloured toolbar:

The previously configured administrations will open:

Activate the field you want to edit (in our example: „Caddie box“) and confirm with OK or the Enter button, the following window appears.
(We will discuss the initialise field function later).

Add numbers
If you have just opened the caddie box administration, the above list is still empty.

To add your numbers to this list, please click on the button New (F9):

- Field from: bis: Here you can enter the numbers to be added. For example, if you want to add the caddie places 0-100, enter a „0“ in the first field and a „100“ in the second field.
- Number of places Here you can enter the maximum number of digits required. Then activate numbers with leading zeros. With this activation, PC CADDIE will always fill in the maximum number of digits. For example, if you have entered „3“ as the number of digits, the caddie place with the number 5 will appear in the list as „005“. This ensures continuous numbering.
- Text before the number Enter the text or a letter here which should appear before the numbering. For example, enter a „D“ for ladies' curlers or an „H“ for men's curlers. Whatever appears before the number will be included in the numbering.
Place a full stop between the number and the letter identifier for a better overview. You can also place the letter directly after the number, but there must be no space in between. This then looks as follows:

- Text after the number Zahl:: Enter the text/letter here which should appear after the numbering. We recommend that you use this function if you want to define the prices later depending on this code letter. Please select a separate letter for all types with different (rental) prices; no letters may be assigned twice.

It is important that the code letter appears after the number, as the sorting will then still take place according to the numbers. Confirm this dialogue with OK.
 Here is an example: In your club, you differentiate between men's, women's and juniors' dressing rooms. As a generic term, you use the following term under Installation of fields - Configuration in the previous section
„Cloakroom“. This saves you a field in the person mask that you can later use for other administrations. You now only need one additional field, but you can use the letters „H“ or „D“ and „J“ before the
numbering to create a separate list for each sub-category of the cloakrooms.
Here is an example: In your club, you differentiate between men's, women's and juniors' dressing rooms. As a generic term, you use the following term under Installation of fields - Configuration in the previous section
„Cloakroom“. This saves you a field in the person mask that you can later use for other administrations. You now only need one additional field, but you can use the letters „H“ or „D“ and „J“ before the
numbering to create a separate list for each sub-category of the cloakrooms.
Edit individual number
Via the button Edit (F7) button to edit an individual number:

With Key you can save the key number. In the fields below you also have the option of Owner, Info, Co-user, Rental period and Category can be entered. If you enter an owner here in the list, the corresponding field for the owner (person mask) is also filled with this number. With the button  button, a new person can be selected from the list and immediately edited with
  to edit it immediately. Once you have made all the entries, you can close the field with Enter or with the button OK button.
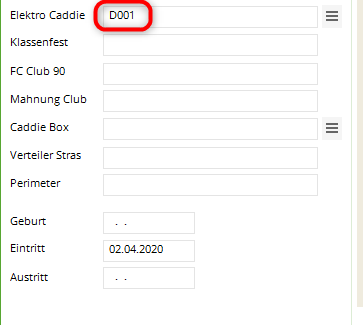
If, for example, the person „Heike Frohgemut“ is assigned to the box „D.002“, you can later switch to the function Persons/…enter new, change, delete… function, select „Heike Frohgemut“ and jump to the Info page - „D.002“ is then also already entered in the Wardrobe field. You also have the option of entering new numbers directly in this field.

Sort list
With Sort (F2), the list can be sorted according to different criteria:

Print list
Standard lists
Use the button Print list button (F8), you can print the various lists directly:


In the selection field Restriction you have the following options to choose from:

Under the field Order field, the following selection options are available:

List with customised layout
Print out a list with key numbers, for example:

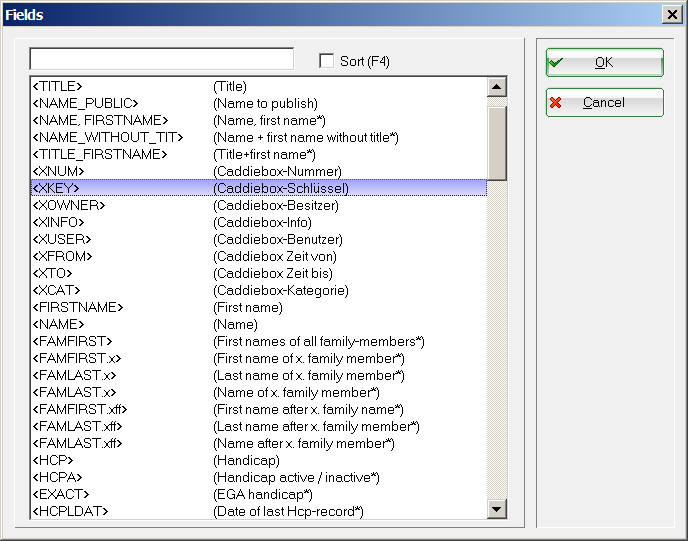
You can create customised layouts yourself at any time. If you create the layout directly here from the box management, you will automatically receive suitable fields for selection:
Rental invoicing
Please note in advance the account area in which the caddie boxes are to be invoiced.
As already mentioned, several boxes can be saved per person. The different box numbers are listed separated by a semicolon„;“ (this happens automatically when the numbers are selected from the list). If necessary, several amounts with different prices are booked for each of the numbers.
The automation of rental invoicing is installed by going to Sales/contribution types, articles/…create, edit, delete to create a separate rent for each box type. Select the following for each box type that you want to create New (F9):

With Status you should definitely „I-Info contribution, annual“ should be selected. This allows PC CADDIE (in contrast to status „J“) to include the number in the text, i.e. from the name „Caddie box“ is automatically turned into, for example „Caddie-Box D.005“.
| Status | Effect |
|---|---|
| Info article | Number of the caddie box is automatically noted, even without <?>then at the end of the article text |
| Info contribution | <?> must be used if the caddie box number in the middle of the article description in the article description, e.g. box 123 in hall 1 |
| Annual | is less useful, as ONLY with <?> in the article text can also be used to assign 2 boxes! Only then can PC CADDIE recognise that 2 „identical“ articles are to be booked in on the same date! |
The decisive factor for the automatic booking assignment is the entry for „Filled Infofeld“: The box for which this rental is intended must be selected here. If you have different sizes or versions of boxes and lockers - which then also have different rental prices - you must differentiate between the individual sizes/versions in PC CADDIE.
To make a distinction, simply add a corresponding identifier for the respective category to the box or locker numbers so that you can clearly differentiate the type. Here are a few examples:
| Hire caddie box with power: | Filter: „S“ |
|---|---|
| Hire family box: | Filter: „F“ |
| Rent single box: | Filter: „E“ |
| Rent single box below: | Filter: „U“ |
| Rent single box top: | Filter: „O“ |
For a subsequent automatic contribution allocation, you must now create an article for each price and enter the corresponding identifier after the filter in the automatic system. The following is an example of an item creation Caddie box with power:

However, if there are no different prices for your boxes and lockers, it is sufficient to select the filter. The field behind it for the identifier can then remain „empty“.
Initialise list
Should it happen that you have deleted your existing caddie box list due to any circumstances.
Or would you like to automatically fill the person masks with the contents of the completed caddie box list or assign them to the corresponding members after restructuring the caddie boxes?
With PC CADDIE you have the option of doing this automatically.
To do this, go to Settings/Cabinets and caddie boxes and select the desired category. Then click on the button box initialisieren:

You will then see a selection window in which you can choose from two variants:

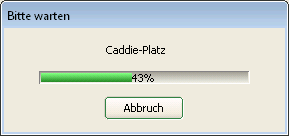
- Field contents from the person mask to the caddie box list holen: You can use this function if you have deleted the entire caddie box list. During the deletion process, however, the contents in the person mask - under the tab Info - tab are not deleted. By selecting this button, the box numbers can be automatically transferred to the locker/caddie box database from the person mask. After confirming the button, a status window appears in which you can see the progress of the action. The empty box list is automatically filled with the contents from the person mask.
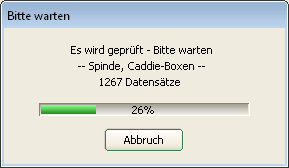
- Empty person fields and according to caddie box list füllen: Here you can automatically transfer the numbers from the caddie box list to the person mask when completely reorganising the caddie box list - it is then no longer necessary to assign the corresponding caddie box or locker to each member individually. After confirming this button, the next status window opens - all persons contained in the caddie box list are automatically assigned the corresponding box:


Working with the locker and caddie box plan
To give your members and guests precise information on where they can find the rented locker, you can link the caddie box list to a plan. In it you can see at any time which boxes are available available or occupied, who they belong to and where they are located. We will be happy to help you create the locker and caddie box plan. For this Formular-Service We calculate approx. 1-2 hours for this, but will be happy to make you a binding offer after consultation.
Once the installation is complete, you will find the cabinet and caddie box plan under the „Show plan“ button:

The plan view naturally depends on your individual circumstances on site. Here is an example:
„C001“ means „Caddie box no. 001“

Red = Occupied. A box with a red dot is an occupied box. As soon as a box is occupied, the name of the tenant/owner is also displayed. The red number in the box is the key number.
Green = Free. A box with a green dot is a free box. If you want to allocate a free box, click on this box. The following window opens:

Either select the person in the „Owner“ field using the search abbreviation (point 1) or using the list button on the right-hand side (point 2).
All additional information such as info, co-user, rental period or category could also be displayed in the plan.
The name of the tenant/owner is now displayed in the plan in the box occupied by him/her and the box colour changes to red. The name of the tenant/owner also appears in the box list.
Examples of locker and caddie box plan
Example 1:

Example 2:

Example 3:

Example 4:

- Keine Schlagworte vergeben
PC CADDIE AG
Bachtelweg 3
6048 Horw/Luzern
Schweiz
Kontakt
![]() Fon +49 2642 9854110
Fon +49 2642 9854110
Fax +49 2642 9854199
![]() Fon +41 41 5110600
Fon +41 41 5110600
Fax +41 41 5110699
![]() Fon +43 13 55667788
Fon +43 13 55667788
Fax +43 13 55667799
Mail support@pccaddie.com
Web www.pccaddie.com
Support Online-Module
PC CADDIE://online
GmbH & Co. KG
Fon: +49 2642 9854120
Fax: +49 2642 9854169
Mail support@pccaddie-online.de
Web www.pccaddie-online.de
Tägliche Supportzeiten:
April-Oktober
09.00 - 20.00 Uhr
November-März
09.00 - 18.00 Uhr