
Inhaltsverzeichnis
Green fee bookings
Select Settings/Programme settings/Green fee booking. Here you can make individual entries regarding green fees and scorecards with bag tags.
 Please note that this menu item can only be edited with the appropriate rights in the password management.
can be edited.
Please note that this menu item can only be edited with the appropriate rights in the password management.
can be edited.
Info area via graphic editor
Since May 2019, it has been possible to generate the info area via the graphics editor. PDF Creator is no longer required for this.
Open Settings/Programme settings/Green fee bookingsand then click on Info area.

If you have already installed the info area via the PDF Creator, the following window will open:

Please click on the tab Settings tab and there Change to new version.

The system then automatically switches to the new method using the graphics editor.
After the changeover, you will see the following window when the info area is reopened.
Info area window

- NEW - Create a new info area
- COPY - Copy an existing info area
- EDIT - Here you can edit the details and make restrictions
- GRAPHICS - You can edit or create the desired file
- UP - Move the info area upwards
- DOWN - Move the info area downwards
- DELETE - This deletes an info area that is no longer required
- SETTINGS - Here you can decide whether the info area is generally active. The position at which the info area is printed and the size at which it is printed. You can also rotate the image. You can only create portrait formats in the graphic. If you want this to be printed landscape - i.e. rotated by 90° - you can do this here.
EDIT - Edit info area

- Assign a suitable name
- Tick the Active box if you want this area to be activated. Remove the tick if this info area should not be active at the moment.
- You can decide whether this info area has priority over the other info areas.
- Decide on which days this info is to be printed.
- Leave the validity blank if you want to print this area immediately and without restriction. If it is only valid in the future or only for a certain period, enter the appropriate date in From - To.
- For the filter, you can decide whether it only applies to a specific group of people.
- Edit info area - here you can edit or create the graphic that is displayed.
GRAPHICS - Create a new info in the graphics editor
Create new information, click on F9 or New. Assign a name With the tick at Active you can ensure that this information is available for selection. Priority „Prioritise printing“ ensures that this information is printed before all others. Decide on which days this information should be printed, taking into account the public holiday rule. You can use a person group to ensure that this information is only printed for players from neighbouring clubs, for example. Using the evaluation groups, you have the option of having this information printed only for the players of the 9-hole course, for example.
SETTINGS Info area Settings
Info area about PDF-Creator
The green fee info area is a simple solution for designing an area on the bag tag yourself. The basic principle is that an Office document is saved as an image and then printed on the bag tag.
Settings for an info text on the bag tag can be set up via Info area with Scorecards can be installed.
There are three different ways to store a text here, which can be changed as required. To make changes, click on the „Open“ button behind the desired document. This opens the installed Office programme.

Change the desired document accordingly (create template…..) and click on File/Print to the „PCC Greenfee info area“ printer. This saves the template as an image in the PCCADDIE/TEXTE folder.

The previously printed document appears in the main window of the info area. If „Activate info area“ is ticked, the image displayed in the window appears on the bag tag with scorecard.


The „Settings“ tab is used to enter where the info text should be printed on a sheet of A4 paper and how large the info box should be.

All the above settings are saved by clicking on „OK“.
Installing PDFCreator
Examples


Green fee parameters General
Next serial number: This menu item enables you to set the green fee count for each year. At the beginning of the year, change the Next serial number to the year and then 00001. This number is printed on the bag tag and is the consecutive green fee count.
If a customer buys a green fee from you, this will be shown under Displayed feature will be displayed. This can be useful for weekday memberships, for example.

If you Displayed feature this information will appear on the screen when you print the bag tag. You have the choice between „leave blank“, „gender“, „age group“, „membership“ and „status“.

This information is purely for your information. It can be very helpful in deciding whether the person has received the correct green fee. Another option is to check how often a player has already played. This is controlled via the booking count.

Booking count
If you activate booking counting and specify a period green fee purchase in the period you have selected, the number of green fees the number of green fees the customer in question has purchased from you. This information is valuable for direct discussions with customers or for internal purposes, such as a bonus system, valuable. All options only apply to the product groups selected under product groups.
 Would you like to give your members the opportunity to bring a guest 3 times a year who does not have to pay a green fee?
You can proceed as follows to keep track of this. Create a product group containing all the items required for green fee-free play. Enter this product group in the next tab. With upper limit enter the number that can be played freely, in this case 3.
Please enter the booking period to be analysed. In this example, it is one year.

Then select the product group to be analysed. In this example, all green fees that are free. This means that you receive information on how often each customer has already played green fee-free when printing the green fee. You can also recognise the green fee number as further information.

Please make these settings when the cash register is closed. If the cash register was open in the background, close it and restart the cash register.
Counting only works for items that have the status „BagTag print“!
Now call up the member in the checkout who is bringing a guest. This is important as the count is only stored for this member. You cannot transfer the green fee to the guest. Please enter Additional text enter the name of the guest.
Green fee limits
As soon as a member has taken their 3 guest green fees, you will receive a warning that the limit has been reached. You can cancel with Cancel to cancel the green fee or decide that this member will receive another free green fee. As soon as you tick the cannot be overridden it is no longer possible to decide in the cash register whether another free green fee will be issued.
The following window opens in the cash register, which cannot be skipped:

TIP If a text is entered in The additional information A or B it will appear in the bag tag as soon as the fields <GFINFA> and <GFINFB> are stored in the bag tag layout. This is very practical for communicating brief information to guests without much effort („Please repair pitch marks“, „30% discount on shoes today“, „Lunch: colourful vegetable stew“, etc…).
Logo 1 / 2
Under the tabs „Logo 1“ and „Logo 2“ you can set images to be printed on the green fee.
3 in 1 SERVICE = Scorecard + bag tag + information
TIP Offer your customers the full service and combine bag tags with scorecards. The scorecard with the player's handicap distribution, the current bag tag and a free text field, e.g. a menu recommendation, a voucher or tournament information, are printed on a perforated A4 sheet.
This is an ideal way of providing the customer with all the necessary documents in a single operation. Members are also very satisfied with an up-to-date scorecard including the latest news. The secretary's office can issue important information directly to the customer in this way.
Also worth noting is the „gentle“ treatment of your printer. Printing bag tags with heavy paper (>170 gr/sqm) in the classic format (DIN A6/A6 long) puts a strain on the print roller of your printer and then leads to black bars if you want to print out a DIN A4 printout on the printer. This is a particularly important argument if you produce your bag tag on expensive laser printers.
You can obtain the perforated A4 sheets from a print shop near you.
See some sample templates below:
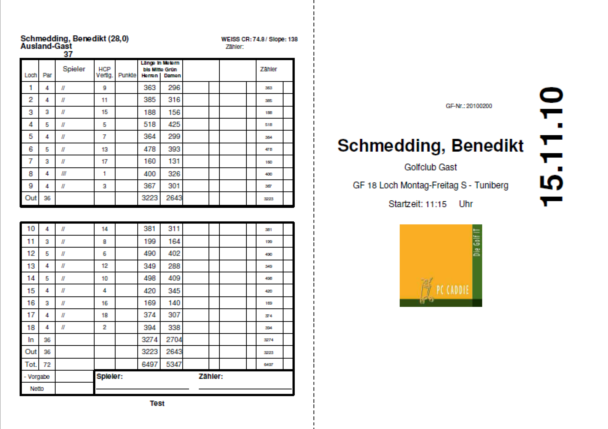
- Scorecard, bag tag (landscape)
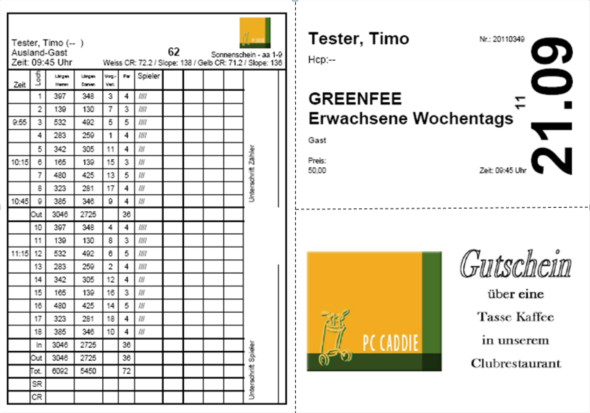
- Scorecard, bag tag, voucher (landscape)
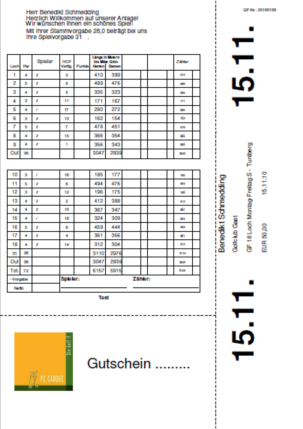
- Scorecard, bag tag, voucher
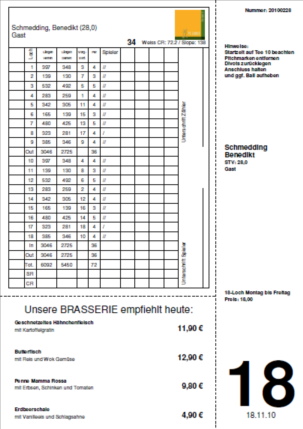
- Scorecard, bag tag, restaurant recommendation


Change place on bag tag with scorecard with new rating
You can find the setting under: Settings/Programme settings/Green fee booking
Once the course with the new rating has been loaded from the intranet, you can also change this for your bag tag with scorecard. Select Scorecard configuration
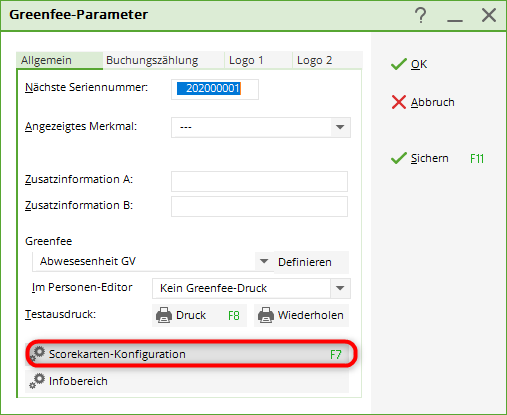
… and actively re-enter your place!

- Keine Schlagworte vergeben
PC CADDIE AG
Bachtelweg 3
6048 Horw/Luzern
Schweiz
Kontakt
![]() Fon +49 2642 9854110
Fon +49 2642 9854110
Fax +49 2642 9854199
![]() Fon +41 41 5110600
Fon +41 41 5110600
Fax +41 41 5110699
![]() Fon +43 13 55667788
Fon +43 13 55667788
Fax +43 13 55667799
Mail support@pccaddie.com
Web www.pccaddie.com
Support Online-Module
PC CADDIE://online
GmbH & Co. KG
Fon: +49 2642 9854120
Fax: +49 2642 9854169
Mail support@pccaddie-online.de
Web www.pccaddie-online.de
Tägliche Supportzeiten:
April-Oktober
09.00 - 20.00 Uhr
November-März
09.00 - 18.00 Uhr