Inhaltsverzeichnis
Inventory
This function is used with the merchandise management module.
The inventory procedure essentially differs depending on whether you take the inventory manually or work with an inventory scanner. Steps 1, 4, 5, 6, 7 are important for manual stocktaking, For stocktaking with a scanner, work through steps 1, 2, 3, 5, 6, 7.
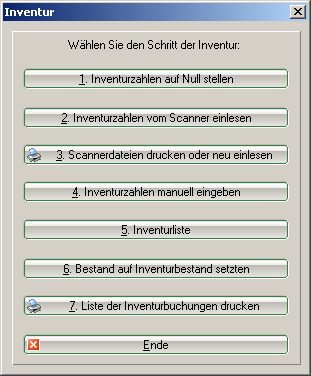
To start the stocktaking process in PC CADDIE, select the following in the main menu Artikel/Inventur:
The individual steps of the inventory are easy to see in this input window.
1. set the inventory figures to zero
The physical inventory figures must be set to zero before each physical inventory. This is always necessary for manual stocktaking and for stocktaking with a scanner. To do this, click on the button 1. set the inventory figures to zero.
This step ensures that the physical inventory figures are not mixed with the old, saved figures from the physical inventory.
2. read in inventory figures from the scanner
3. print or re-read scanner files
These functions are only relevant for stocktaking with a scanner. For example, you scan a shelf and then read this data from the scanner into PC CADDIE. The description can be found below (depending on which inventory scanner you are using).
4. enter inventory figures manually
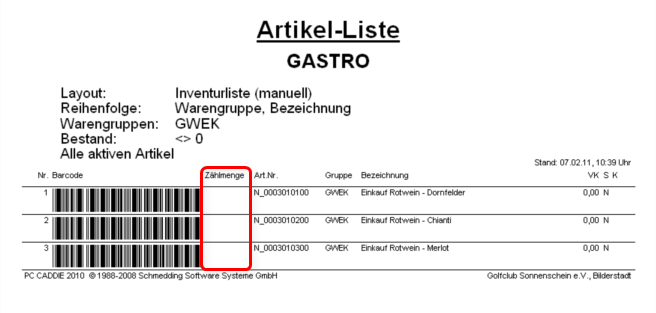
This function is primarily intended for manual stocktaking. Count the items according to the previously printed item list and then enter the counted quantity per item under „Counted quantity“. Then enter these counted stocks with the help of Enter inventory figures manually in PC CADDIE:
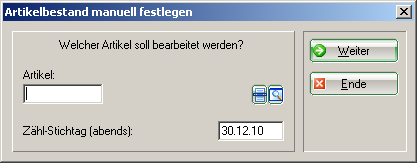
Select your first article by entering the search abbreviation or using the list function (F2), click Next and the following window appears:
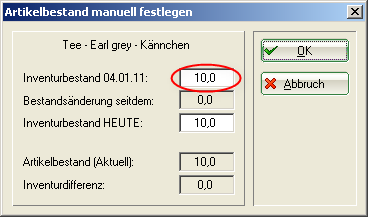
You enter the counted stock of this item, any difference is immediately displayed under „Inventory difference“. After OK and Next the next article is displayed.
If you have a barcode scanner at the checkout, you also have the option of scanning the printed barcode on the item list at this point. Otherwise, select the items manually one after the other.
As soon as you have entered all inventory figures, you can close the window with End to exit the window.
5. inventory list
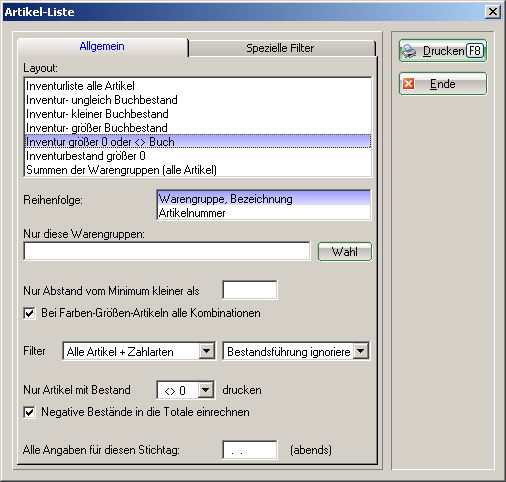
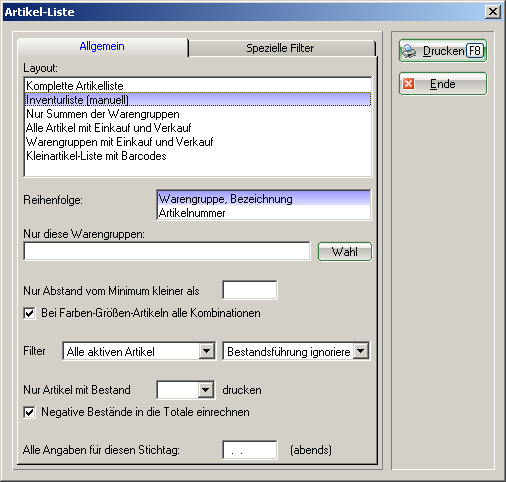
Use this function to print out various evaluation and control lists to check the differences. The following window opens:
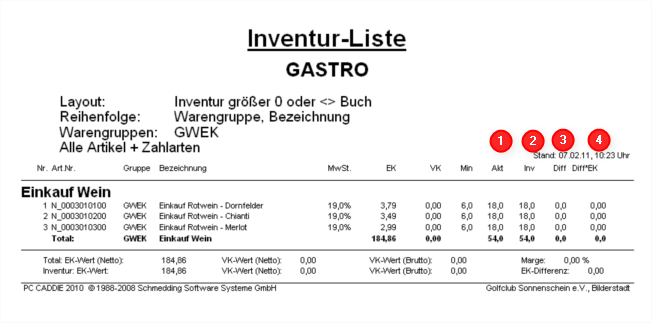
The list of differences is already preset: „Inventory greater than 0 or <> Buch“
Die relevanten Spalten sind hier mit 1 bis 4 gekennzeichnet.
- Aktueller Bestand in PC CADDIE
- Bestand laut gezählter Inventur
- Differenz zwischen beiden Beständen
- Differenz zwischen beiden Beständen mit dem Wert des Einkaufspreises
Mit Ende können Sie die Funktion verlassen.
Nachdem Sie die Listen kontolliert haben und eventuell nötige Korrekturen vorgenommen haben, z. B. sollten Sie natürlich keine Minusbestände übernehmen, können Sie die Inventurzahlen übernehmen.
6. Bestand auf Inventurbestand setzen
Mit dieser Funktion verändern Sie den kompletten Artikelbestand Ihrer Gastronomie auf den neuen, gezählten und eingegebenen Inventurbestand. Um mögliche Differenzen zu verbuchen, legen Sie bitte vorab unter Personen/…neu erfassen, ändern, löschen eine neue Person an, die z.B. „Inventur, Differenzen“ heißt und als Suchkennzeichen ein „i“ hat. Danach klicken Sie auf Punkt 6 der Inventur Bestand auf Inventurbestand setzen.
Es wird automatisch die neu angelegte Inventur-„Person“ angewählt, damit auf deren Umsatzkonto die Inventurdifferenzen verbucht werden. Die weiteren Optionen können je nachdem – für welche Artikel Sie jetzt die Bestandszahl auf die Zählmenge verändern wollen – aktiviert bzw. deaktiviert werden. Der automatische Vorschlag entspricht dem üblichen Verfahren. Bitte lesen Sie die Auswahlmöglichkeiten genau und wenden Sie sich für Rückfragen bitte an den PC CADDIE Support. Aktivieren Sie die benötigten Optionen und bestätigen anschließend mit Starten.
7. Liste der Inventurbuchungen drucken
Zum Schluss können Sie die Korrekturbuchungen ausdrucken, wenn Sie dies wünschen. Die Inventur ist jetzt abgeschlossen. Die Artikelbestände wurden automatisch auf die Zählmenge gesetzt. Zur Kontrolle bzw. zur Überprüfung des neuen Anfangsbestandes können Sie unter Artikel/Drucken…/Artikel-Liste verschiedene Artikel-Listen drucken.

Manuelle Inventur
Bei der manuellen Inventur drucken Sie sich zuerst Artikel/Drucken…/Artikel-Liste eine „Inventurliste (manuell)“ aus:
Bei Bedarf können Sie hier unterschiedliche Optionen (bestimmte Warengruppen, Reihenfolge) einstellen, vorzugsweise wählen Sie lediglich „Alle aktiven Artikel“ mit einem Bestand von „<> 0“. This list contains a column Counted quantity column for entering the stock:
Inventory with laser scanner
In catering establishments, stocktaking is usually carried out manually instead of using a scanner. If you still work with a scanner, please read the correct procedure here: Using an inventory scanner
- Keine Schlagworte vergeben

