
Inhaltsverzeichnis
Printer
Under Settings/Printers you will find all the printers that are installed on your computer.

- Use the top two buttons to send the document to the printer.
- You can view the printout on the screen using the two buttons at the bottom.
TIP Here you can quickly and easily test printing from PC CADDIE:

 A separate implementation is generally not necessary with PC CADDIE. However, if you always want to control a specific printer for bag tag printing, for example, you could store this in the template. Please contact the PC CADDIE Support
Create new layout
PC CADDIE offers you the option of working with various different layouts (e.g. a clear, legible font for lists, an elegant, slightly larger font and a logo for invoices etc.). You can find and make these settings in the printer dialogue under Settings/Printer.

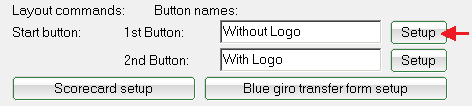
Via the button Settings button takes you to the basic settings of the selected layout. The desired changes can be customised, modified and saved here.

- Name the buttons that are to appear on the printer or screen for printing.
TIP Give them clear names so that people understand what is behind them (e.g. Arial and Courier / With logo and Without logo etc.).
- Define the desired fonts, sizes etc. here.
- Specify how thick lines should be printed (e.g. after headings) and position the letterhead for letters.
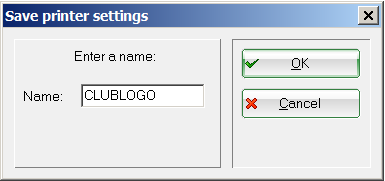
- Give the newly created layout a clear name.
- If you want to print in colour (e.g. eclectic lists), you can define the desired colours individually.


To define the special properties of the two buttons described under point (1), click on the respective button Set.
The two options can be installed independently of each other and do not need to have anything in common.

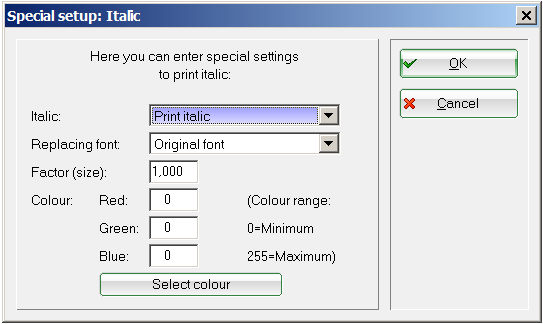
You will now be taken to the main menu for the setting or the selected print layout:

- Specify the basic information such as format, feed source or orientation.
- To control special paper formats (scorecards etc.) or special print trays, you have the option of working with special commands. Please contact PC CADDIE Support for this.
- Define the margins of the current layout.
- You have the option of adding a logo or image to the print layout. Select the graphic and place it using the corresponding position fields.
The desired graphic must be saved in a location where everyone has access, i.e. the „My Documents“ folder is not suitable, use a shared network drive instead. - If required, the formatting can be installed differently for subsequent pages (e.g. no logo on subsequent pages).

Delete old layout

These layouts are saved in the Explorer in the PCCADDIE/DRUCKER folder.


Right-click on the GDI files and remove them using the „Delete“ menu item
Print text translation
In PC CADDIE there are predefined texts and dialogues that cannot be changed. For example, in the layout of the annual statement, the list of contributions is displayed in a fixed format:

Via the button Translation button in the print dialogue takes you to the print text translation:

The following window opens:
 Define the text to be changed here and enter the replacement text behind it.

The original text is now replaced by the new text. As shown in the image at the bottom, you can choose whether the new word should have the same width as the old one (then separate the entry with = or whether the new word/text should have the required length, then separate the entry with =.
Please note that this translation affects all areas in PC CADDIE. For example, if you translate the word „Bar“ to „Cash“, a „Barbara“ will become a „Cashcasha“  . Remove temporary translations after use or be aware that not everything can be controlled via the print text translation.
TIP You can access this via Settings/Programme settings/Print text translation directly to the Print-text translation.
Tray selection
The following setting can be made so that PC Caddie automatically selects a slot.
Settings/Printer

Select the desired printer. Shift (ctrl) + F11 Press . The following window opens:

Scroll to DC_BINNAMES
The shaft number must be entered in the marked brackets ().
Then click on Set button.

Enter SOURCE: for special commands and the desired shaft number, which was entered previously. In this example 1.

- Keine Schlagworte vergeben
PC CADDIE AG
Bachtelweg 3
6048 Horw/Luzern
Schweiz
Kontakt
![]() Fon +49 2642 9854110
Fon +49 2642 9854110
Fax +49 2642 9854199
![]() Fon +41 41 5110600
Fon +41 41 5110600
Fax +41 41 5110699
![]() Fon +43 13 55667788
Fon +43 13 55667788
Fax +43 13 55667799
Mail support@pccaddie.com
Web www.pccaddie.com
Support Online-Module
PC CADDIE://online
GmbH & Co. KG
Fon: +49 2642 9854120
Fax: +49 2642 9854169
Mail support@pccaddie-online.de
Web www.pccaddie-online.de
Tägliche Supportzeiten:
April-Oktober
09.00 - 20.00 Uhr
November-März
09.00 - 18.00 Uhr